Build Your Own Notion Finance Tracker
Tired of messy spreadsheets? Learn to build a powerful Notion finance tracker from scratch. Take control of your budgets, expenses, and financial goals today.
If you're fed up with rigid budgeting apps and clunky spreadsheets, you're not alone. Building your own finance tracker in Notion is a complete game-changer, giving you the flexibility to manage everything—expenses, subscriptions, and financial goals—all in one place.
This guide will walk you through how to build a powerful, personalized system from scratch.
Why a Custom Notion Tracker Beats Any App
If you've ever felt boxed in by an off-the-shelf finance app, you know the frustration. They shoehorn you into predefined categories and workflows that rarely fit your actual life. A student juggling loans and part-time work has completely different needs than a freelancer tracking project income, yet most apps don’t see the difference.
That’s exactly why building your tracker in Notion is so powerful. You're not just a user—you're the architect. You get to design a system that mirrors how you actually think about and handle your money.
Complete Control and Customization
The biggest win here is total flexibility. You decide what to track and, more importantly, how you want to see it. Forget being stuck with generic "Entertainment" or "Utilities" categories. You can build a structure that finally makes sense for your lifestyle.
- Create Your Own Categories: Get as specific as you want with categories like "Weekend Coffee Runs," "Side Hustle Software," or "Vacation Fund" for real, granular insight.
- Build Integrated Dashboards: Imagine seeing your daily expense log, monthly budget, upcoming subscription renewals, and long-term savings goals all on a single screen.
- Adapt on the Fly: As your financial situation evolves—maybe you start a business or begin saving for a down payment—your tracker can grow right along with you.
A custom Notion finance tracker isn't just another tool; it's your financial command center. It gives you the power to build a system that adapts to your life, not the other way around.
The Power of an All-in-One Workspace
Notion’s real magic is its ability to connect everything. Your financial data no longer has to live on an island, separate from the rest of your life. You can link transactions directly to your project boards, connect savings goals to your travel plans, or even tie expenses to entries in a personal journal.
We explore tons of ways to connect different parts of your life in our guides on the Flowtion blog.
This connected, all-in-one approach is what fueled Notion's incredible growth, with its user base rocketing from just 1 million in 2019 to over 30 million by 2022. That kind of explosion shows a clear demand for tools that are genuinely adaptable.
Laying the Foundation: Your Core Financial Databases
Any great Notion finance tracker is built on a handful of core databases. This isn't just about making a fancy spreadsheet; it’s about creating an interconnected system that gives you real-time financial clarity. We’re going to build out the four essential pillars: Transactions, Categories, Accounts, and Budgets. Nailing this foundation is the single most important part of the whole process.
Think of these databases as the engine of your financial world. Your Transactions database is the logbook for every dollar that comes in or goes out. Categories tell you the story behind that money. Accounts track which pocket the money came from, and Budgets set the rules for the road ahead. When they all work together, the magic happens.
Let's build them out, one by one, focusing on the specific properties that make the system truly powerful.
The Transactions Database: Your Digital Ledger
This is where the action happens. You'll be in here daily, logging every expense and income entry, so it needs to be detailed but lightning-fast to use.
Go ahead and create a new database. These are the essential properties you’ll want to add to capture what matters for each transaction:
- Name (Title): A simple description, like "Morning Coffee" or "Client Payment - Project X."
- Amount (Number): The value of the transaction. Be sure to set the number format to your currency.
- Date (Date): The day the transaction actually happened. This is non-negotiable for accurate monthly and yearly reports.
- Type (Select): A simple dropdown with two options: "Income" and "Expense."
- Status (Status): A property to track whether a transaction is "Cleared" (it's hit your bank account) or is still "Pending."
This database is the backbone of your entire setup. Every single report, calculation, and insight will pull its data from right here.
The Categories Database: Mapping Your Spending DNA
Just knowing how much you spend is only half the story. The real power comes from understanding where it’s all going. The Categories database lets you group your spending into meaningful buckets, shining a light on your financial habits.
Create another new database for your Categories. To start, all you really need is one property: the Name (Title). This is where you'll create an entry for each of your spending areas. Think "Groceries," "Rent," "Utilities," "Subscriptions," and "Entertainment." Feel free to get more granular if it helps you, like splitting "Dining Out" from "Takeout."
Pro Tip: Don't go overboard with categories at first. It's much easier to manage 10-15 core categories than it is to juggle 50. You can always add more later as you spot new spending patterns.
The Accounts Database: Knowing Where Your Money Lives
Your money is rarely all in one place. You’ve likely got a checking account, a savings account, maybe a credit card or two. The Accounts database helps you keep tabs on all of them, giving you a clear view of your balances and where your transactions are coming from.
Set up your Accounts database with these properties:
- Account Name (Title): Something clear like "Main Checking Account" or "Visa Credit Card."
- Type (Select): Categorize it. Good options are "Checking," "Savings," "Credit," or "Cash."
- Starting Balance (Number): The initial amount in the account at the moment you start tracking.
This is especially critical for freelancers and small businesses who need to manage multiple streams of money. If you need a more advanced setup for business, our guide on how to track business expenses offers some deeper strategies you can build into your Notion workspace.
The Budgets Database: Setting Your Financial Guardrails
Last but not least, the Budgets database is where you set spending limits for your categories each month. This is the crucial step that shifts you from simply tracking the past to proactively planning for the future.
Create one more database for Budgets and add these key properties:
- Budget Name (Title): A descriptive name helps, like "Groceries Budget - October."
- Amount (Number): The maximum you plan to spend in this category for the month.
- Month (Date): Set this to the first day of the relevant month. This makes sorting and filtering a breeze later on.
To make this easier to visualize, here's a quick reference guide for the essential properties we've just discussed for your core databases.
Core Database Property Schema
| Database | Essential Properties | Property Type | Purpose |
|---|---|---|---|
| Transactions | Name, Amount, Date, Type, Status | Title, Number, Date, Select, Status | Logs every single income and expense entry. The core ledger. |
| Categories | Name | Title | Groups spending into meaningful buckets (e.g., Groceries, Rent). |
| Accounts | Account Name, Type, Starting Balance | Title, Select, Number | Tracks balances across different financial accounts (e.g., Checking, Credit). |
| Budgets | Budget Name, Amount, Month | Title, Number, Date | Sets monthly spending limits for each category to guide your finances. |
With these four databases in place, you’ve officially built the architectural framework of a seriously robust Notion finance tracker. Next up, we’ll bring it all to life by connecting them with Relations and Rollups.
Connecting Your Data with Relations and Rollups
<iframe width="100%" style="aspect-ratio: 16 / 9;" src="https://www.youtube.com/embed/NM8oFVb8SAY" frameborder="0" allow="autoplay; encrypted-media" allowfullscreen></iframe>Alright, you've got your core databases built. Now for the fun part—making them talk to each other. This is the step where your separate lists transform into a smart, interconnected system that actually does the heavy lifting for you. We’ll be using two of my favorite Notion features: Relations and Rollups.
Think of a Relation as the thread that ties everything together. When you log a coffee purchase, you don't just care about the $5 you spent; you want to know it came from your "Checking Account" and belongs to your "Dining Out" category. Relations are what build these critical connections.
Creating Your Core Database Links
First things first, let's link your Transactions database to your Categories and Accounts. This is the absolute backbone of the entire tracker.
Head over to your Transactions database and add a new property. Choose the Relation type and point it to your Categories database. Great. Now, do that one more time, but create a second Relation property that links to your Accounts database.
With those two relations set up, every time you add a new transaction, you’ll see two new fields. Instead of typing out "Groceries," you'll now select it directly from your Categories list. This simple change is a game-changer for data integrity—no more typos messing up your end-of-month reports. It’s a small bit of upfront work that saves you massive headaches later.
This diagram shows how everything connects, with your transactions sitting right at the heart of the system.
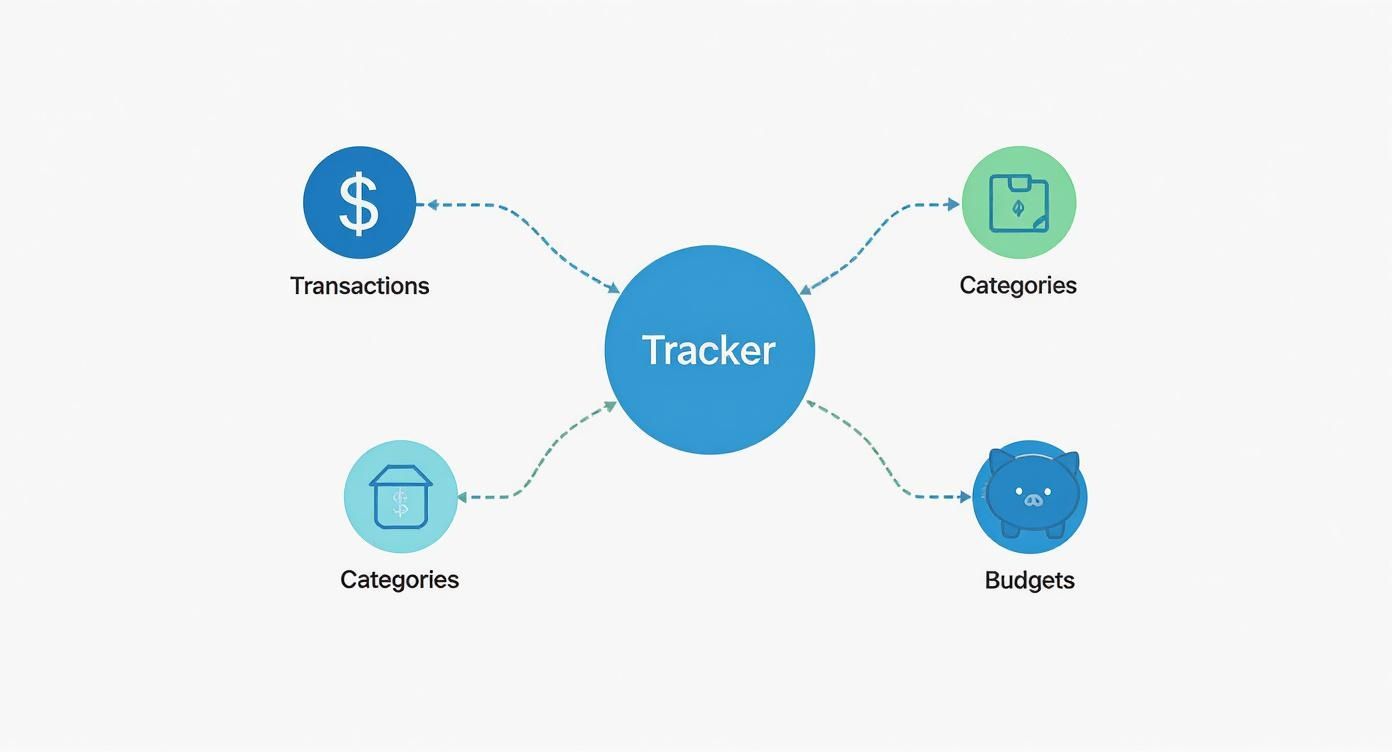
As you can see, every piece of information has a purpose, flowing between databases to paint a complete picture of your financial health.
Using Rollups to Automate the Math
Now, let's get to the real magic. If a Relation is the thread, a Rollup is the tool that pulls on that thread to fetch data and run calculations automatically. Let's put this into practice by getting a real-time total of how much you've spent in each category.
Jump into your Categories database. You should see a new property that Notion automatically added, showing all the linked transactions for each category. We're going to build on that. Add another new property, but this time select the Rollup type.
Here’s how to set it up:
- Relation: Choose the "Transactions" relation you just created.
- Property: From the Transactions database, select your "Amount" property.
- Calculate: Set this to Sum.
Just like that, your Categories database is now displaying the total amount spent for every single category. This number updates automatically every time you log a new expense. This is the foundation of any good budget vs. actuals system.
You've officially automated one of the most tedious parts of managing your money.
To tie it all together, we need to connect our budgets to our actual spending. Go to your Budgets database and add one last Relation property, this time linking to your Categories database. This lets you connect a budget item (like "October Groceries Budget") to the actual "Groceries" category where spending is being tallied. This final link is what will allow us to see exactly how our plans stack up against reality, which we'll get into next.
Bringing Your Financial Data to Life
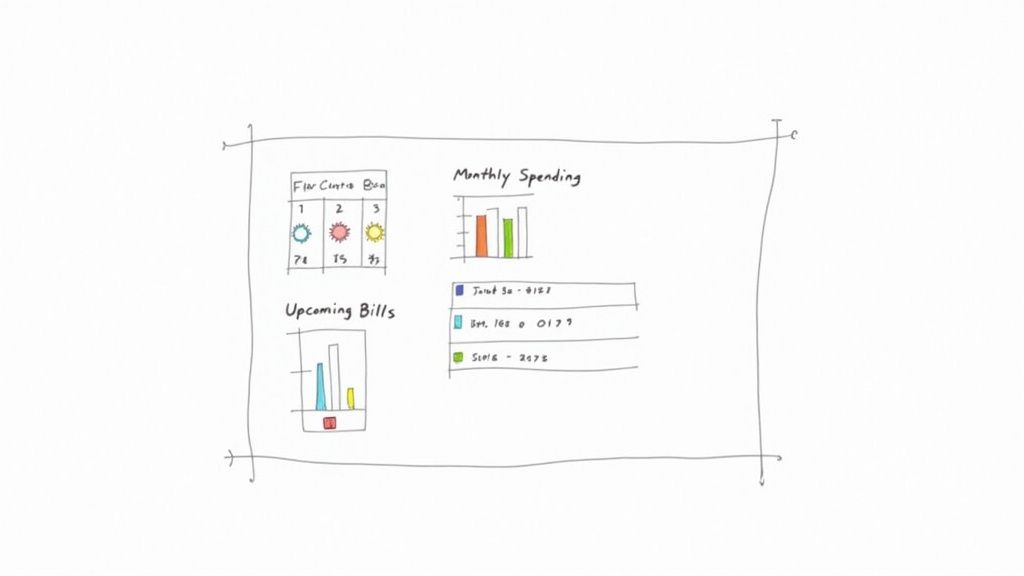
Now that you've got the databases connected and the relational magic is happening, it's time for the fun part. We're going to turn all that raw data into something you can actually use. This is where your Notion tracker evolves from a simple spreadsheet into a personal finance command center.
The idea is to build a dashboard that gives you a clear picture of your financial health at a single glance. Forget digging through tables and rows of numbers. We'll create specific, visual views that answer key questions like, "Am I overspending on groceries this month?" or "What bills do I need to pay next week?"
Creating a "Budget vs. Actuals" Dashboard
This is one of the most powerful views you can build. It instantly tells you how your spending stacks up against your plan. I find a Gallery view works brilliantly for this.
Head over to your Budgets database and create a new view, choosing Gallery for the layout. This will turn each budget category into its own card, which is perfect for a quick visual scan.
Next, you'll want to customize what information shows up on each card. I recommend setting the card preview to display the budgeted amount right next to the actual spending (the rollup from your transactions). This immediate side-by-side comparison makes it painfully obvious which categories need attention.
To really level this up, we can add a simple formula. In your Budgets database, create a new Formula property and call it "Progress." Then, pop this formula in:
prop("Actual Spending") / prop("Budget Amount")
Edit the property and set it to display as a "Percent" or, even better, a "Ring." Just like that, each category card now has a progress bar, giving you an immediate visual cue of how much of your budget you’ve burned through.
Building an "Upcoming Bills" View
Never miss a payment again. A focused view showing what's due soon is an absolute must-have. For this, a clean list or table view works best.
On your main dashboard page, create a linked view of your Transactions database. I like to name mine "Upcoming Bills" to keep it clear.
Here’s how to set it up so it only shows what you need:
- Add a filter for Type is "Expense." You don't need to see income here.
- Add another filter for Status is "Pending" or "Upcoming."
- And the most critical part: sort the view by Date in ascending order.
This configuration gives you a tidy, chronological list of every bill coming down the pike. If you want to get more advanced, you can create a whole separate database just for recurring subscriptions. We actually have a dedicated guide on creating a Notion subscription tracker that walks you through that exact process.
Speed Things Up with Templates
Entering every single transaction from scratch is tedious and, frankly, a waste of time. This is a perfect job for database templates. Inside your Transactions database, you can set up templates for common entries like a "New Expense."
For instance, your "New Expense" template can automatically set the Type to "Expense" and the Status to "Cleared." You can even assign a default icon to make it pop. Now, adding a new expense takes just one click, which not only saves you a ton of time but also keeps your data consistent.
A well-organized tracking system makes all the difference. The 'Finance Tracker by Rosidssoy' template, for instance, has helped countless users become more conscious of their spending, boasting a 4.95-star rating with 92% of reviewers giving it top marks for usability. Read more about how a solid template can improve financial awareness.
Taking Your Tracker to the Next Level
Once you've got the hang of the basics, your Notion finance tracker can become so much more than a simple expense log. This is where you graduate from just recording transactions to building a full-blown financial command center. The real goal is to create a system that doesn't just show you where your money went, but gives you the clarity to direct where it goes next.
A fantastic starting point is creating a dedicated Subscriptions database. Sure, you can log these in your main transactions list, but separating them out gives you a crystal-clear overview of all your recurring payments. It’s the perfect place to track renewal dates, costs, and even flag services you’re thinking about cutting.
For freelancers or small businesses juggling dozens of software subscriptions, this is a game-changer. You can even connect this database to your Transactions to automatically generate monthly expense entries, making sure you never miss a payment or forget about that "free trial" that’s about to hit your credit card.
Calculating Your Real-Time Net Worth
One of the most motivating metrics you can track is your net worth. It’s the ultimate high-level snapshot of your financial health, cutting through the noise of monthly budgets to show you the bigger picture. And you can build a simple net worth calculator right inside your Notion dashboard.
All you need to do is create a new database called "Assets & Liabilities." This is where you'll list everything you own of value (assets) and everything you owe (liabilities).
- Assets: This includes things like the current balance of your savings and checking accounts, the market value of your investment portfolio, and even the estimated value of physical assets like your car or home.
- Liabilities: Here, you'll list any outstanding debts—think student loans, credit card balances, mortgages, or car loans.
You can pull in your cash balances automatically using rollups from your Accounts database. For everything else, a quick manual update each month will do. With a simple formula property (sum of Assets - sum of Liabilities), you'll have a real-time net worth figure. Watching that number grow over time is an incredible source of motivation.
A Notion finance tracker truly comes alive when it reflects your entire financial world. By pulling in assets, liabilities, and investments, you shift from simply reacting to expenses to proactively managing your wealth.
Tracking Investments and Live Data
If you’re managing an investment portfolio, Notion can be the perfect place to consolidate all your performance data. Start with a dedicated Investments database to track your individual holdings, purchase prices, and current quantities.
Now, Notion doesn't pull live stock prices out of the box, but the community has come up with some incredible solutions to this.
Advanced templates, like the 'Finance Tracker with Superpowers,' have pushed the boundaries of what's possible. It uses a custom integration to monitor over 300 assets with daily updates, pulling data from more than 60 global exchanges. You can see exactly how this template tracks live asset prices on Notion.com to get some inspiration. By tapping into these tools or even connecting to APIs yourself, your tracker can give you a dynamic, accurate view of your entire portfolio right alongside your daily spending.
Answering Your Top Questions
As you start piecing together your finance tracker, you're bound to have some questions. Let's tackle the most common ones I hear, so you can build your system with confidence right from the get-go.
Can I actually connect my bank account to this?
This is probably the number one question people ask. The short answer is no, not directly. Notion doesn't have a built-in feature for bank integration, and this guide is built around a manual entry system.
Honestly, I see this as a feature, not a bug. Manually logging your transactions forces you to be mindful of your spending in a way that automated feeds just can't replicate. You feel every purchase.
That said, if automation is a deal-breaker for you, you can look into third-party tools like Zapier or Make. They can act as a bridge, creating a new database entry whenever your banking app registers a transaction. It's an option, but I’d encourage you to try the manual method first.
How would this work for managing money with a partner?
Great question! This system is surprisingly flexible for shared finances. The easiest way to adapt it is by adding a ‘Person’ property to your Transactions database. You can use either the built-in Person property or a simple Select property.
Just tag who made the purchase when you log it. From there, you can create filtered views on your main dashboard to see exactly what you need:
- Each person’s individual spending habits.
- A clear view of all shared, joint expenses.
- How you’re both tracking toward your budget goals.
It's a beautifully simple and transparent way to manage household finances together, all without needing another separate, clunky app.
My Take: This is where Notion really outshines rigid financial apps. A single, simple property can transform your personal tracker into a powerful, collaborative hub for you and your partner.
Is it actually safe to put my financial data in Notion?
Security is obviously a huge concern. While Notion does use standard security practices like data encryption, it's important to remember it’s not a bank. The responsibility for securing your data ultimately falls on you.
Think of it like locking your front door. You need to practice good digital hygiene. Always use a strong, unique password for your Notion account. More importantly, enable two-factor authentication (2FA). It's a non-negotiable step that adds a critical layer of security to your entire workspace.
What if I mess up and enter something wrong?
Don't sweat it. Fixing a mistake is incredibly easy. Because this whole system is just a set of databases that you own and control, you can simply find the incorrect entry in your Transactions table and edit it directly.
Wrong amount, wrong date, wrong category—it doesn't matter. You have full control to make corrections on the fly, ensuring your financial records are always accurate.
Ready to skip the setup and jump straight into organizing your finances? Flowtion has a whole suite of expertly designed Notion templates, including advanced trackers for subscriptions and projects. You can duplicate them into your workspace and be up and running in seconds. Explore the full collection of Flowtion templates here.
Related Articles
Build a Notion Financial Tracker From Scratch
Ditch generic apps. Learn how to build a custom Notion financial tracker to manage expenses, budgets, and see your entire financial picture in one place.
Daily Planner Templates for Notion
Discover templates for daily planner that fit your workflow. Learn how to choose, customize, and build productive habits with a flexible digital planner.
Goal Planning Templates for 2025 Success
Discover how goal planning templates can turn ambitions into clear, doable steps - start organizing, tracking, and achieving today.
Did you like this article?
Discover our premium Notion templates that will help you implement these productivity systems immediately.